
This post contains affiliate links.
Do you want to change up your Spring and Easter decor? Trade your dyed Easter eggs for decoupaged eggs. Here is an easy diy decoupage egg tutorial.

Good morning! Spring is upon us and Easter is a couple of weeks away but to be honest I am a little behind decorating at the house. In fact, I still have bowls of pine cones and acorns on my dining table.

This week I decided to change that and I started by making a few decoupage eggs to add to cups, bowls, and baskets around the house. Let me say that I am the least crafty person I know and that this is the easiest “craft” you will ever make.

Decoupage Easter eggs
If you would like to skip the Paas Easter egg dye and add Easter eggs that match your decor than decoupage eggs are the perfect craft for you.
Supplies for Decoupage Easter eggs.
All you need to make your own beautiful decoupage eggs is 4 items, paper napkins, Modpodge, eggs and a brush. Easy peasy. You can also use clip art, or tissue paper instead of napkins and you can blow out your own real eggs in place of plastic eggs.

For this project I used a package of napkins that I found at TJ Maxx, and some faux eggs that I already had in my closet.
Directions for making Decoupage Easter eggs
1.Start by pulling the back off the napkins, my napkins were actually 3-ply, which I learned the hard way when my first few eggs didn’t work and looked lumpy and terrible. Which is actually laughable considering this is a craft you cannot mess up.

2.Then, take your napkins, tissue paper or paper and either tear them into strips or cut out the designs that you like. I am lazy, and I started this at 10:00 last night, so I tore my napkins into little pieces. Tip: You could also paint the eggs and then cut out the flowers and decoupage them onto the eggs.

3. Next, take the egg and “paint” it with a thin layer of the ModPodge, add the torn paper napkin pieces, then add a little Mod Podge and a little more napkin, continue until the egg is decorated the way that you like. Once you have the entire egg decorated set the egg aside to dry on a piece of waxed paper.

After a little trial and error I found that if you are using plastic eggs you can “roll” the eggs between your hands to get the napkins/glue to adhere better and to make the surface more smooth. I am not sure that I would use that technique with eggs that you blew out the insides, they might be too fragile.
Just to recap, here is a list of supplies that you need to make decoupage easter eggs.
- Eggs, either plastic or real eggs that have had the egg blown out and washed
- Napkins, tissue paper, craft paper
- Paint brush, foam brush
- Modpodge
Tips
Decoupage Easter eggs or decoupage tissue Easter eggs can also be made using items from The Dollar Tree, Michaels, or they all have a large variety of tissue paper, napkins, eggs and more. If you do not have Modpodge you can use Elmers glue.
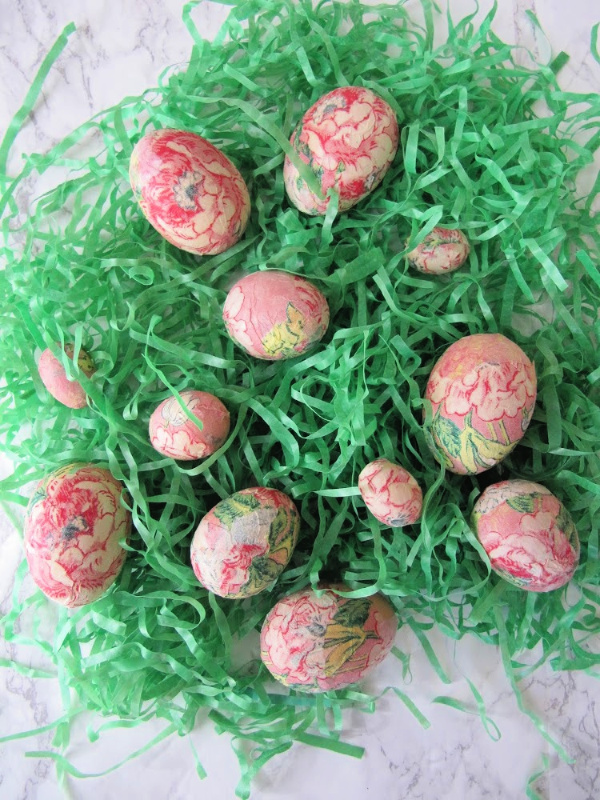
That is it! Get a basket, some faux grass and you have yourself a beautiful display.

I hope that you have a great day!
Pin Me for Later!


Reader Interactions