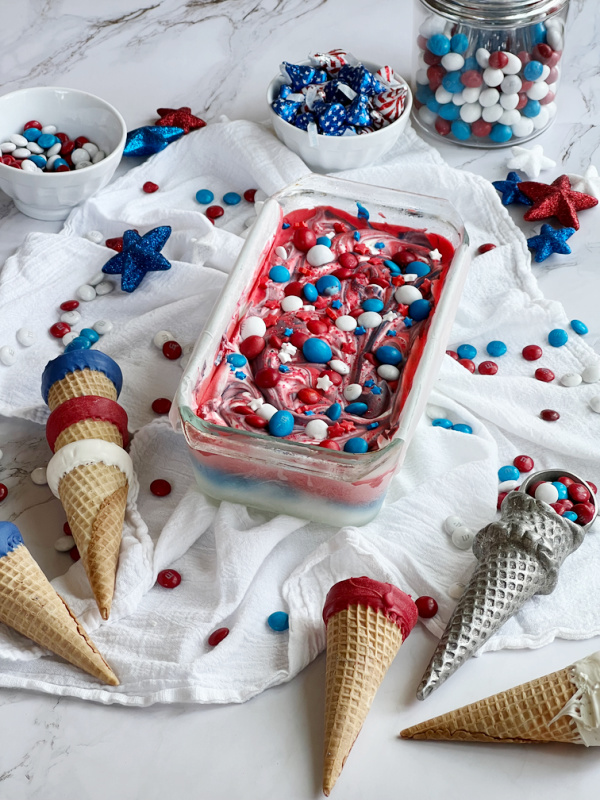
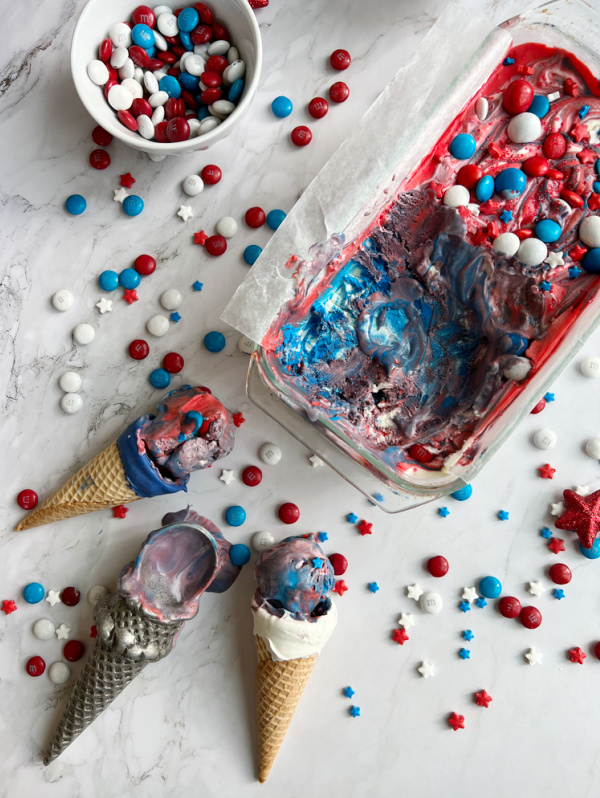
4th of July No Churn Red White & Blue Ice Cream is easy to make, patriotic and delicious. Perfect for your holiday celebration.

Good morning friends! Today I am joining my friend Sheri for our monthly series, “Sweet treats for your Sweet tooth.” Each month we will be sharing our favorite version of a sweet treat, everything from cookies, bars, cakes, puddings and more. With 4th of July just around the corner I thought I would make one of my family favorites, no-churn ice cream. In the past I have made vanilla, pistachio, chocolate peanut-butter cup and cookie ice cream and several other no churn recipes. But I have never made a colorful, patriotic one. Red, white and blue 4th of July no churn ice cream paired with festive dipped sugar cones is perfect for Independence Day, Memorial Day and other patriotic holidays.
4th of July No-churn Ice Cream
Do you like ice cream? If so you are going to give this recipe rave reviews, not only for the flavor but also because it is so easy to make! If you can make whipped cream you can make any no-churn ice cream. You don’t need any special equipment or an ice cream machine and it is easy to customize with add ins and flavors. The hardest part is waiting for it to freeze so that you can enjoy it.
What you need to make red, white and blue ice cream
Because it is made with simple ingredients it is important to use quality ingredients, like my favorite vanilla extract, Neilsen-Massey. It is pricy, but it is worth it. During the holidays you can find it at TJMaxx, Marshalls and HomeGoods for a lot less, so keep your eyes peeled.
- 1 14oz. can Sweetened condensed milk
- 2 cups heavy whipping cream
- 2 teaspoons vanilla extract or vanilla bean paste
- red gel food coloring
- blue gel food coloring
- patriotic sprinkles
- M&M’s
Ingredients for Dipped Cones
- 1/3 package each red, white and blue melting wafers,
- 1 package Ice cream cones, Sugar or traditional.
Directions for 4th of July No-churn Ice Cream
- In the bowl of a stand mixer fitted with a paddle attachment or in a large mixing bowl using an electric hand mixer whip the heavy cream on medium-high speed until stiff peaks form.
- Then add the can of sweetened condensed milk and the vanilla extract and mix again until they well combined.
- Pour the ice cream mixture into three bowls, in one add red food coloring, in another add blue food coloring, and stir to combine. Leave the third bowl white.
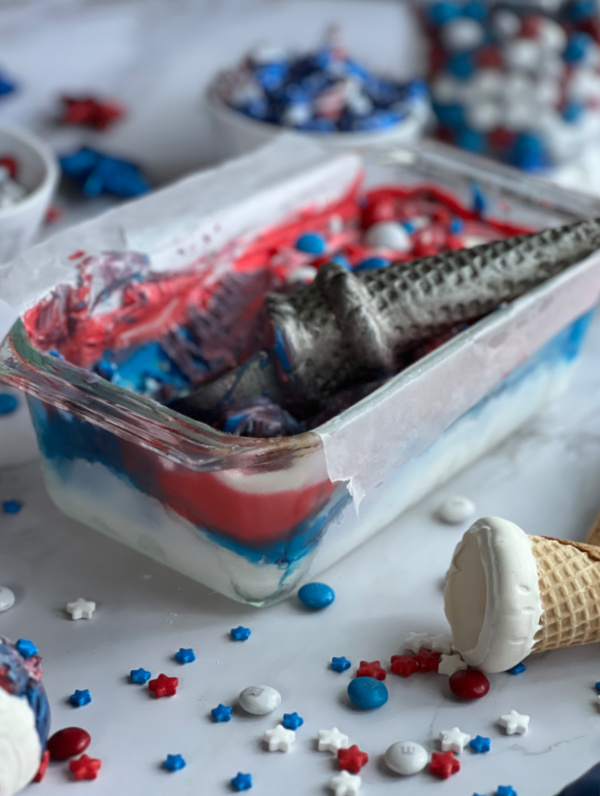
- Line a loaf pan or shallow container with plastic wrap or parchment paper, let it hang over the sides a little bit.
- Pour the blue ice cream into the loaf pan and smooth the top, then add the white ice cream, smooth the top, finally add the red ice cream to the loaf pan. Using a knife or a skewer swirl the colors together to make a pattern. Alternately you can add dollops of each color to the pan and then swirl it around.
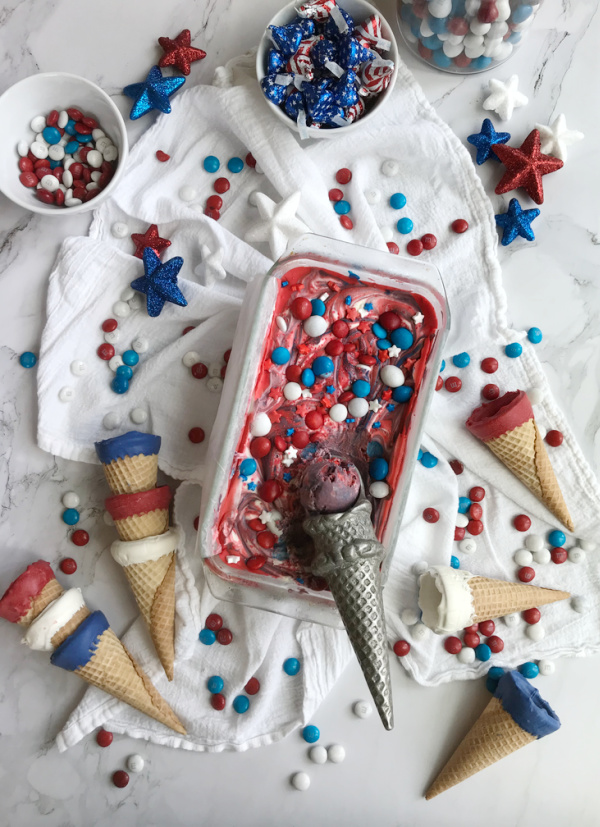
- Add the patriotic candy, sprinkles and red, white and blue M&M’s to the top of the ice cream and press down a little.
- Cover the pan with plastic wrap and freeze for at least 8 hours, preferably overnight.
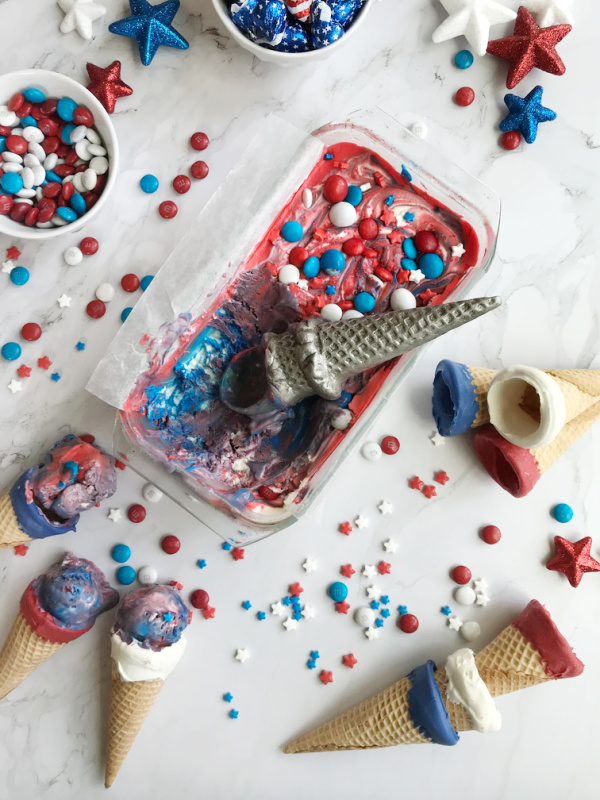
- When ready to serve remove from freezer and let sit at room temperature for at least 5 minutes, scoop out desired amount into a bowl or a cone and enjoy!
Directions for Dipped Cones
- Place each wafer color in a sperate bowl and melt the wafers according to the package directions. Or, in a heatproof bowl, melt the candy wafers in the microwave in 30-second intervals at 50% power. Stir after each interval until melted. If the melts are too thick, stir in a teaspoon or so of shortening until melted(this is for the entire package of melts).
- Line a baking sheet with waxed paper. Dip the cones in the colored wafers and set on the waxed paper to set up, about 10 minutes.
Note: If you like, just after you dip the cones you can sprinkle them with colored sugar, patriotic sprinkles or jimmies. You will have extra melted wafers left over. I used them to make a red, white and blue bark to serve with plain vanilla ice cream. You can use them to drizzle on popcorn, make dipped Oreos or save them for another project.
Variations
- This 3 ingredient no-churn ice cream recipe makes the perfect vanilla ice cream.
- Use different colors to create rainbow ice cream or themed ice cream for parties and celebrations.
- Mix cocoa powder into the base, then swirl cooled homemade fudge into the ice cream to make chocolate fudge swirled ice cream.
- Add roasted blueberries or strawberry sauce to create a fruity flavor.
Looking for more summertime treats?
Chocolate Peanut Butter Rice Krispie Treats
Red White and Blue Patriotic No-Bake Cheesecake
Shop the Post
Looking for the ice cream scoop? It is vintage but available on eBay.
That’s All for Now
I hope that you try this easy homemade ice cream recipe for the Fourth of July or on another day to beat the summer heat. Have a great day and thank you for spending part of it with me.
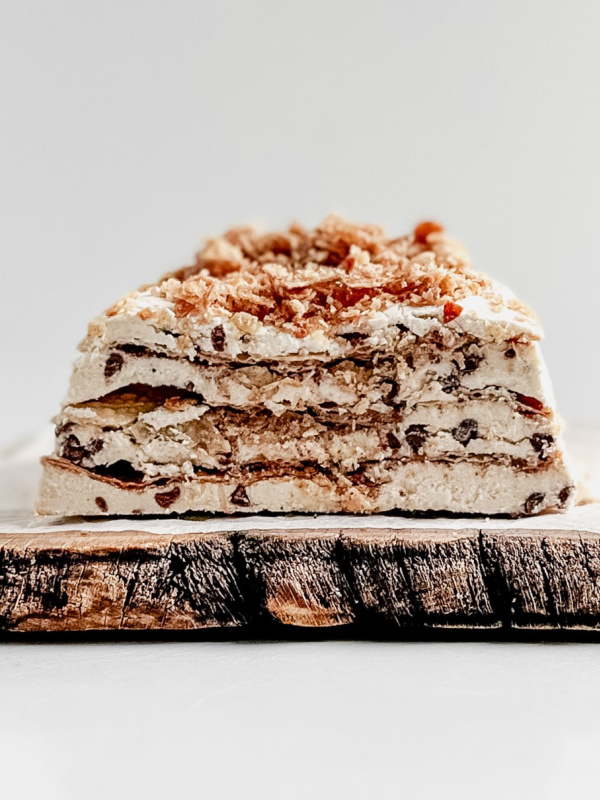
Don’t forget to visit Sheri to get the recipe for Cannoli Ice-Box Cake!
Pin the recipe and share it with your friends.
You can also keep up with me on Pinterest, Instagram, and Facebook. And last but not least, if you like Pinecones & Acorns share it with a friend!
Print
4th of July No Churn Red White & Blue Ice Cream
4th of July No Churn Red White & Blue Ice Cream is easy to make, patriotic and delicious. Perfect for your holiday celebration.
- Total Time: 8 Hours Freezing Time
- Yield: 8 servings 1x
Ingredients
- 1 14oz. can Sweetened condensed milk
- 2 cups heavy whipping cream
- 2 teaspoons vanilla extract or vanilla bean paste
- red gel food coloring
- blue gel food coloring
- patriotic sprinkles
- M&M’s
Ingredients for Dipped Cones
1/3 package each red, white and blue melting wafers,
1 package Ice cream cones, Sugar or traditional.
Instructions
Directions for Ice Cream
In the bowl of a stand mixer fitted with a paddle attachment or in a large mixing bowl using an electric hand mixer whip the heavy cream on medium-high speed until stiff peaks form.
Then add the can of sweetened condensed milk and the vanilla extract and mix again until they well combined.
Pour the ice cream mixture into three bowls, in one add red food coloring, in another add blue food coloring, and stir to combine. Leave the third bowl white.
Line a loaf pan or shallow container with plastic wrap or parchment paper, let it hang over the sides a little bit.
Pour the blue ice cream into the loaf pan and smooth the top, then add the white ice cream, smooth the top, finally add the red ice cream to the loaf pan. Using a knife or a skewer swirl the colors together to make a pattern. Alternately you can add dollops of each color to the pan and then swirl it around.
Add the patriotic candy, sprinkles and red, white and blue M&M’s to the top of the ice cream.
Cover the pan with plastic wrap and freeze for at least 8 hours, preferably overnight.
When ready to serve remove from freezer and let sit at room temperature for at least 5 minutes, scoop out desired amount into a bowl or a cone and enjoy!
Directions for Dipped Cones
Place each wafer color in a sperate bowl and melt the wafers according to the package directions. Or, in a heatproof bowl, melt the candy wafers in the microwave in 30-second intervals at 50% power. Stir after each interval until melted. If the melts are too thick, stir in a teaspoon or so of shortening until melted(this is for the entire package of melts).
Line a baking sheet with waxed paper. Dip the cones in the colored wafers and set on the waxed paper to set up, about 10 minutes.
Notes
Notes:
Just after you dip the cones you can sprinkle them with colored sugar, patriotic sprinkles or jimmies. You will have extra melted wafers left over. I used them to make a red, white and blue bark to serve with plain vanilla ice cream. You can use them to drizzle on popcorn, make dipped Oreos or save them for another project.
- Prep Time: 15 Minutes
- Cook Time: 0 minutes
- Category: Dessert
- Method: Freezing
- Cuisine: American


Elizabeth this is SOOO pretty! I love a good no-churn ice cream and the addition of dipped cones is perfection. And that ice cream scoop! Details, please! 🙂 Love doing this series with you! xoxo
Thank you Sheri! No-churn ice cream is easy, delicious and the perfect summer treat. I love sugar cones, dipped they can work for all themed parties.
The scoop is the one thing I am asked about the most on this blog. I have two different ones and they were given to me over 20 years ago by my mother in law. Here is a link to a pre-loved one on eBay, https://rstyle.me/+rxyjaumFUoG98FY1rZrvCg.
Love this series because I always learn a new and delicious dessert from you!xo
What a fun idea for patriotic celebrations! (And it would work for me too because the Union Jack is red, white and blue!!) Thank you so much for sharing this delicious no churn ice cream recipe, Elizabeth!
April, I think you would love this ice cream, it is so easy and it is delicious.
Hi Elizabeth,
You create such creative and fun desserts for the holidays and all other times too. It looks like from what you have shared you have been baking and creating most of your life.
I love the passion you have in your heart.
Katherine, you made my day! Thank you for your very kind comment.
I love to bake and learned by my grandmother and mothers side.
Have a wonderful weekend!